
In Part 1: setup, we infected the system with the Trojan. It should still be running on the victim machine. If you haven’t read that section, I strongly recommend you go back and read it.
Now that we’ve infected a test machine, the goal of this step is to experiment a little with the debugger and learn a little about the Energizer Trojan. This can all be discovered with a simple disassembler, but I find it more fun to take apart a live sample. All we’re going to do is add a breakpoint at the recv() function and see where it’s called from.
This step is going to require Debugging Tools for Windows. If you haven’t installed it already, install it on the victim machine.
Sections
This tutorial was getting far too long for a single page, so I broke it into four sections:
- Part 1: setup
- Part 2: runtime analysis (windbg)
- Part 3: disassembling (ida)
- Part 4: generating probes (nmap)
Runtime Analysis
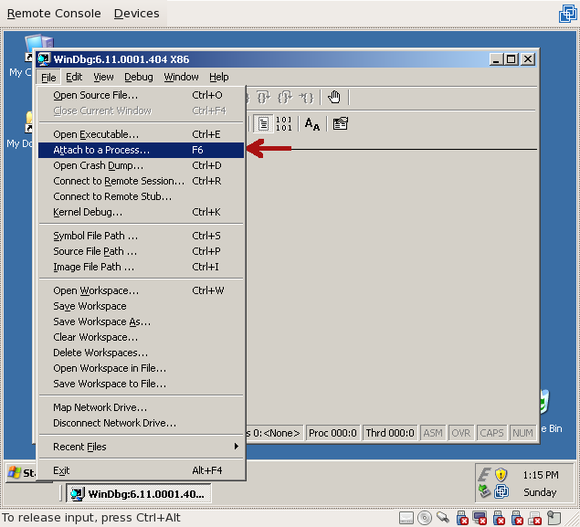
Run “windbg”; then, under the “File” menu, choose “Attach to a Process” (or press F6):
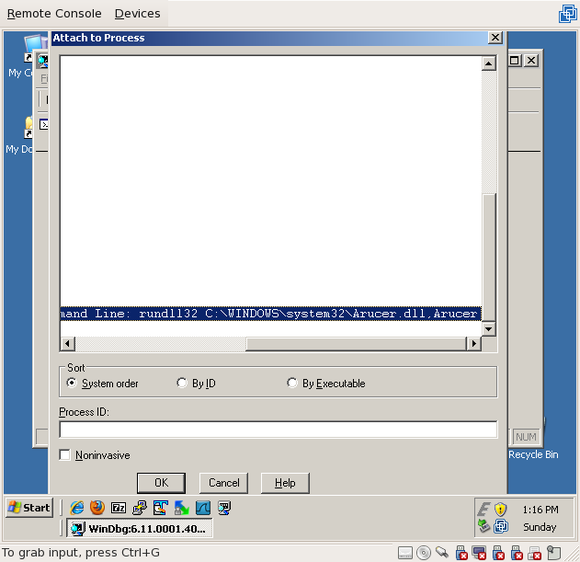
Navigate the list and find “rundll32.exe”:

If you aren’t sure if it’s the right one, expand it with the “+” and validate that it’s running “Arucer.dll”:
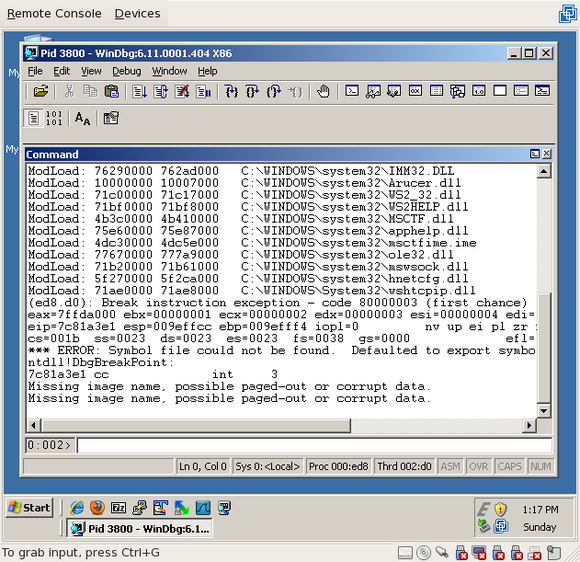
Once you hit “OK”, the debugger will attach to the Trojan process and suspend it, waiting for your actions. It’ll look something like this:
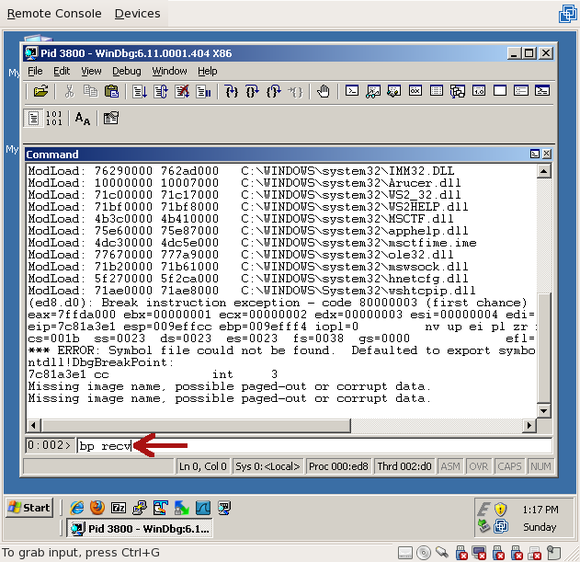
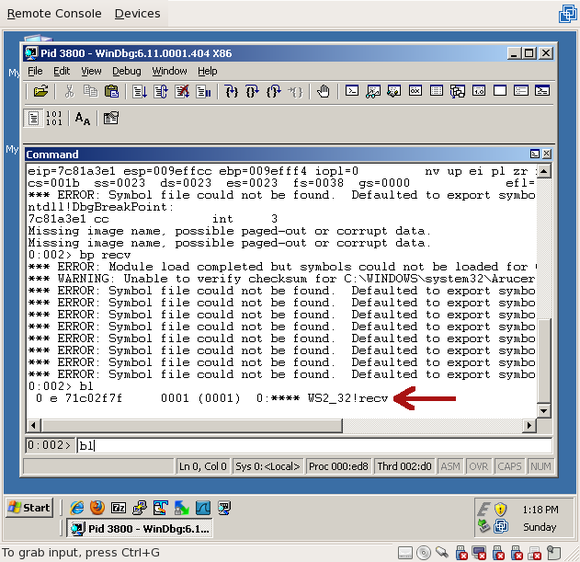
All we want to do is add a breakpoint on the “recv” function. “recv” is a function in Winsock that reads data from the network. Since this Trojan is listening on a port, it’ll likely try to receive data from anything that connects to it. In the command window of Windbg, type “bp recv”:
To validate that the breakpoint was successfully created, you can run the “bl” command (“breakpoint list”), which will print all breakpoints that have been set on this process:
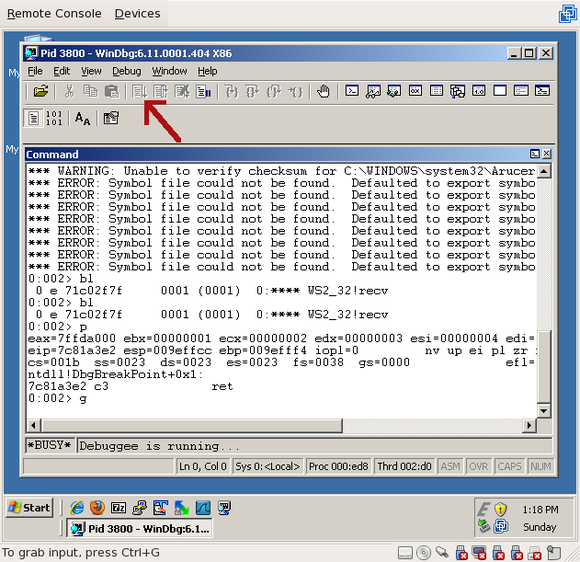
Now that we’ve set a breakpoint on recv() and verified that it exists, resume the Trojan process by clicking the “Resume” button (or press F5, or type “g<enter>”):
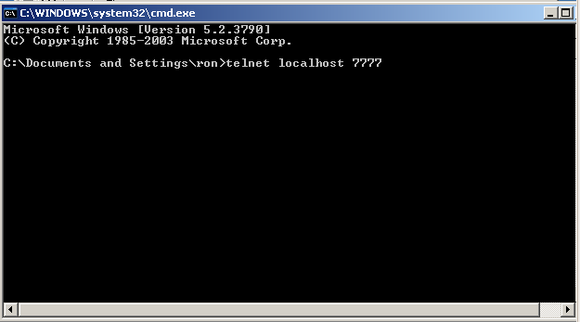
You’ll note that nothing happens right away. And unless something tries to connect to the host on port 7777, nothing is going to happen. The reason is that the Trojan is sitting on the accept() call, waiting for a connection. Obviously, if we want to trigger the recv() call, we have to connect to it. So, open up a new command prompt (“cmd.exe”) and telnet to localhost port 7777:
As soon as you do that, the accept() call finishes and the Trojan attempts to receive some data, hitting our breakpoint:
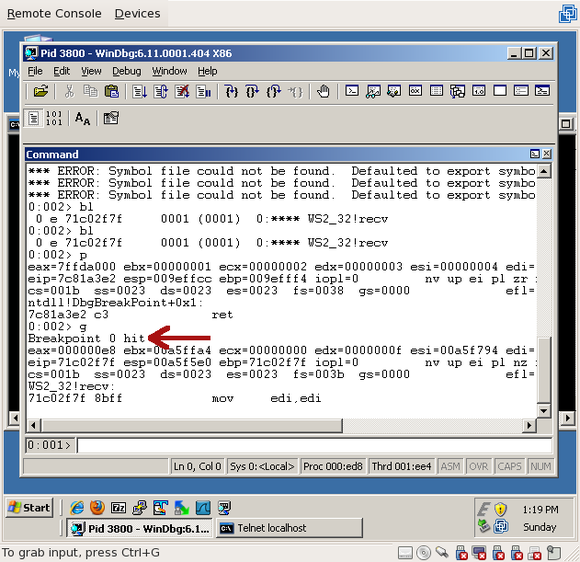
The process is once again suspended and waiting for us to do something. You can have some fun at this point and poke around, but first run the “k” command, which is short for “call stack” – it’ll tell us who called recv(), who called that function, and so on:
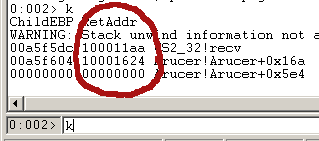
Make note of the two addresses here – 0x100011aa and 0x10001624 – we’ll be using those later. 0x100011aa is the place where recv() was called, and 0x10001624 is the place where that function was called.
That brings us to the end of the runtime analysis. We now know the call path that leads up to the recv(), and can work our way backwards to find out what kind of data it wants to receive.
At this point, feel free to play around in the debugger and see what you can learn. The first thing I usually do is tell the recv() function to return using Debug->Step Out and look at how it processes the data – make sure you type something in the console for it to receive first.
When you’re all done, restart the process so we can test later:
Then run it:
In the next section, Part 3: disassembling, we’ll look at the code that makes the Trojan tick.
Comments
Join the conversation on this Mastodon post (replies will appear below)!
Loading comments...